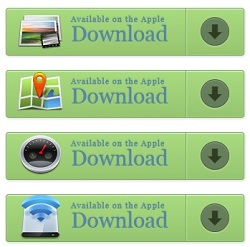
In this tutorial im gonna explain how to addnice Css3 buttons with image hover effect. you can use it for any buttons. specially for sale items.you can change image as your like. Im using Css3 and HTML for these buttons. Tutorial You can check my Earlier buttons
articles here
DEMO
1. Log in to blogger account and Click drop down.
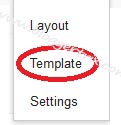
2. Now select "Template" Like Below.
3. Now you can see Live on blog, Click EDIT HTML Button"
4. Now click Proceed button.
5.Find this code by using Ctrl+F ]]></b:skin>
6. Paste below code Before ]]></b:skin> code
7. Go to blogger and click drop-down like 1st step and select Layout
8. Click Add Gadget and select 'HTML/Javascript"
9. Paste below code.
10. Now save your template. You are done.
articles here
1. Log in to blogger account and Click drop down.
2. Now select "Template" Like Below.
3. Now you can see Live on blog, Click EDIT HTML Button"
4. Now click Proceed button.
5.Find this code by using Ctrl+F ]]></b:skin>
6. Paste below code Before ]]></b:skin> code
.a-btn{
    background:#a9db80;
    background:-webkit-gradient(linear,left top,left bottom,color-stop(#a9db80,0),color-stop(#96c56f,1));
    background:-webkit-linear-gradient(top, #a9db80 0%, #96c56f 100%);
    background:-moz-linear-gradient(top, #a9db80 0%, #96c56f 100%);
    background:-o-linear-gradient(top, #a9db80 0%, #96c56f 100%);
    background:linear-gradient(top, #a9db80 0%, #96c56f 100%);
    filter:progid:DXImageTransform.Microsoft.gradient( startColorstr='#a9db80', endColorstr='#96c56f',GradientType=0 );
    padding-left:90px;
    padding-right:105px;
    height:65px;
    display:inline-block;
    position:relative;
    border:1px solid #80ab5d;
    -webkit-box-shadow:0px 1px 1px rgba(255,255,255,0.8) inset, 1px 1px 3px rgba(0,0,0,0.2);
    -moz-box-shadow:0px 1px 1px rgba(255,255,255,0.8) inset, 1px 1px 3px rgba(0,0,0,0.2);
    box-shadow:0px 1px 1px rgba(255,255,255,0.8) inset, 1px 1px 3px rgba(0,0,0,0.2);
    -webkit-border-radius:4px;
    -moz-border-radius:4px;
    border-radius:4px;
    float:left;
    clear:both;
    margin:10px 0px;
    overflow:hidden;
    -webkit-transition:box-shadow 0.3s ease-in-out;
    -moz-transition:box-shadow 0.3s ease-in-out;
    -o-transition:box-shadow 0.3s ease-in-out;
    transition:box-shadow 0.3s ease-in-out;
}
.a-btn img{
    position:absolute;
    left:15px;
    top:13px;
    border:none;
    -webkit-transition:all 0.3s ease-in-out;
    -moz-transition:all 0.3s ease-in-out;
    -o-transition:all 0.3s ease-in-out;
    transition:all 0.3s ease-in-out;
}
.a-btn .a-btn-slide-text{
    position:absolute;
    font-size:36px;
    top:18px;
    left:18px;
    color:#6d954e;
    opacity:0;
    text-shadow:0px 1px 1px rgba(255,255,255,0.4);
    -webkit-transition:opacity 0.2s ease-in-out;
    -moz-transition:opacity 0.2s ease-in-out;
    -o-transition:opacity 0.2s ease-in-out;
    transition:opacity 0.2s ease-in-out;
}
.a-btn-text{
    padding-top:5px;
    display:block;
    font-size:30px;
    text-shadow:0px -1px 1px #80ab5d;
}
.a-btn-text small{
    display:block;
    font-size:11px;
    letter-spacing:1px;
}
.a-btn-icon-right{
    position:absolute;
    right:0px;
    top:0px;
    height:100%;
    width:80px;
    border-left:1px solid #80ab5d;
    -webkit-box-shadow:1px 0px 1px rgba(255,255,255,0.4) inset;
    -moz-box-shadow:1px 0px 1px rgba(255,255,255,0.4) inset;
    box-shadow:1px 0px 1px rgba(255,255,255,0.4) inset;
}
.a-btn-icon-right span{
    width:38px;
    height:38px;
    opacity:0.7;
    -webkit-border-radius:20px;
    -moz-border-radius:20px;
    border-radius:20px;
    position:absolute;
    left:50%;
    top:50%;
    margin:-20px 0px 0px -20px;
    border:1px solid rgba(0,0,0,0.5);
    background:#4e5c50 url(https://blogger.googleusercontent.com/img/b/R29vZ2xl/AVvXsEjtOmH7wDzeYyU9IiS7ydSj5FlFD7F42DqE7gt0IGHxoOyckZ8AP8CYFuJhXp2KZnd846ZizamF8_HuEndR433kCqu0ZmWUwdfdDlSvrpwbXxr1QUDHVIp4aBfPZHrwgNVzQmS-9dwDolRW/s1600/arrow_down_black.png) no-repeat center center;
    -webkit-box-shadow:0px 1px 1px rgba(255,255,255,0.3) inset, 0px 1px 2px rgba(255,255,255,0.5);
    -moz-box-shadow:0px 1px 1px rgba(255,255,255,0.3) inset, 0px 1px 2px rgba(255,255,255,0.5);
    box-shadow:0px 1px 1px rgba(255,255,255,0.3) inset, 0px 1px 2px rgba(255,255,255,0.5);
    -webkit-transition:all 0.3s ease-in-out;
    -moz-transition:all 0.3s ease-in-out;
    -o-transition:all 0.3s ease-in-out;
    transition:all 0.3s ease-in-out;
}
.a-btn:hover{
    -webkit-box-shadow:0px 1px 1px rgba(255,255,255,0.8) inset, 1px 1px 5px rgba(0,0,0,0.4);
    -moz-box-shadow:0px 1px 1px rgba(255,255,255,0.8) inset, 1px 1px 5px rgba(0,0,0,0.4);
    box-shadow:0px 1px 1px rgba(255,255,255,0.8) inset, 1px 1px 5px rgba(0,0,0,0.4);
}

.a-btn img{ margin-top:-15px;}

.a-btn:hover img{
    -webkit-transform:scale(10);
    -moz-transform:scale(10);
    -ms-transform:scale(10);
    -o-transform:scale(10);
    transform:scale(10);
    opacity:0;
}
.a-btn:hover .a-btn-slide-text,
.a-btn:hover .a-btn-icon-right span{
    opacity:1;
}
.a-btn:active{
    position:relative;
    top:1px;
    background:#80ab5d;
    -webkit-box-shadow:1px 1px 2px rgba(0,0,0,0.4) inset;
    -moz-box-shadow:1px 1px 2px rgba(0,0,0,0.4) inset;
    box-shadow:1px 1px 2px rgba(0,0,0,0.4) inset;
    border-color:#a9db80;
}
.a-btn:active .a-btn-icon-right span{
    -webkit-transform:scale(1.4);
    -moz-transform:scale(1.4);
    -ms-transform:scale(1.4);
    -o-transform:scale(1.4);
    transform:scale(1.4);
}
7. Go to blogger and click drop-down like 1st step and select Layout
8. Click Add Gadget and select 'HTML/Javascript"
9. Paste below code.
<div class="content">
                <div class="button-wrapper">
                    <a href="#" class="a-btn">
                        <span class="a-btn-slide-text">$9</span>
                        <img src="https://blogger.googleusercontent.com/img/b/R29vZ2xl/AVvXsEiI8fyXPMH-HpgJBKlSSsIrbJW8gyNrh2ItfMCUoTHPhOcAS4M6qZvtR-IM2buTn8hwmV0wp_X1v6VhRNcsGfDquwN4oWy5rN9xqwYlMHci_lUoPL3-4JlPID1SZasKk-Fq_6iz9ceGR0KN/s1600/1.png" alt="Photos" />
                        <span class="a-btn-text"><small>Available on the Apple</small> App Store</span>
                        <span class="a-btn-icon-right"><span></span></span>
                    </a>
                    <a href="#" class="a-btn">
                        <span class="a-btn-slide-text">$75</span>
                        <img src="https://blogger.googleusercontent.com/img/b/R29vZ2xl/AVvXsEgdun2cY0uw7OfabO8_o9pJF_Z0B70_EkTC2OfHNDdjtt8LwsdEmspBbzpyE_LDSFre-MvfnPxLIrXH54QaEklyGVRzGjdz7I0o3ulNh2bjG3n7qA0Ybv9y1SYYv8yUoXC0BEJd07g6a9dk/s1600/2.png" alt="Maps" />
                        <span class="a-btn-text"><small>Available on the Apple</small> App Store</span>
                        <span class="a-btn-icon-right"><span></span></span>
                    </a>
                    <a href="#" class="a-btn">
                        <span class="a-btn-slide-text">$25</span>
                        <img src="https://blogger.googleusercontent.com/img/b/R29vZ2xl/AVvXsEibBRrkIfT48ZnA4D4uTzyyRAopsspv360UnjobT2c16ZeJLAucROyc-C41a7jDpCK1McRDaMlzVYCZbl4GBIQROFSYsl0HOlsUTZxHBqNHRmCk1uOFVWBMCDH7zlZw2VKvNvI4d2zMorzS/s1600/3.png" alt="Settings" />
                        <span class="a-btn-text"><small>Available on the Apple</small> App Store</span>
                        <span class="a-btn-icon-right"><span></span></span>
                    </a>
                    <a href="#" class="a-btn">
                        <span class="a-btn-slide-text">$100</span>
                        <img src="https://blogger.googleusercontent.com/img/b/R29vZ2xl/AVvXsEhhxs7h1simbf0MkvB9CtnVGF-GgSakVnr_rM80Za8ivxEIP-pv4fEI-yNataA9HEYGPUDxXWcQdzCv5NX17EArzVyr2Fxbm8SPGAai7oDPNrSmSUBIM78QNj4AaE1spUXvuk3_h8A8lUVE/s1600/4.png" alt="Wireless" />
                        <span class="a-btn-text"><small>Available on the Apple</small> Download</span>
                        <span class="a-btn-icon-right"><span></span></span>
                    </a>
                </div>
            </div>
*Replace # with button Button URL
10. Now save your template. You are done.


nice widget and simple ways to used. thank a lot for script. permission to share.
ReplyDeleteYou are welcome :)
DeleteThanks Admin for sharing nice information about this.
ReplyDeleteI have subscribed and used many of your tricks for my blogger blog networks to give them special attractive look.
Thanks & keep sharing.
You are welcome friend.
Deletecan you help me to help me to change the coloulour of each button in different coulour plzzzzzzzzz
ReplyDeleteWhat is your color code, you wanna try?
Delete