In this tutorial im gonna explain how to add Greeny Css3 navigation bar for blogger. You can add this cool menu bar within few seconds.This Greeny navigation bar work fine with every modern internet browsers. This include with nice drop down menu. So, You can link with your main pages by using this Css3 thin navigation bar.Will see how to add this CSS3 navigation bar within few seconds.
You may like these articles
Add Multilevel CSS3 Menu Bar With Icons
Modern Ribbon Hover Effect Menu Ba
Rollover Css3 Navigation Bar
Beautiful Bouncing jQuery Menu Bar
1. Log in to blogger account and Click drop down.
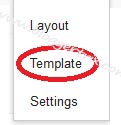
2. Now select "Template" Like Below.
3. Now you can see Live on blog, Click EDIT HTML Button"
4. Find this tag by using Ctrl+F ]]></b:skin>
5. Paste below code Before ]]></b:skin> tag
6. Go to blogger and click Layout
7. Click Add Gadget and select 'HTML/Javascript
8. Paste below code.
9. Now save your HTML/Javascript'. You are done.
If you have any problem regarding this Greeny Css3 Navigation Bar. Leave a comment.
You may like these articles
Add Multilevel CSS3 Menu Bar With Icons
Modern Ribbon Hover Effect Menu Ba
Rollover Css3 Navigation Bar
Beautiful Bouncing jQuery Menu Bar
Greeny Css3 Navigation Bar For Blogger
1. Log in to blogger account and Click drop down.
2. Now select "Template" Like Below.
3. Now you can see Live on blog, Click EDIT HTML Button"
4. Find this tag by using Ctrl+F ]]></b:skin>
5. Paste below code Before ]]></b:skin> tag
/* The CSS3 Code for the menu starts here bloggertrix.com */
 .btrix-greenymenu{width:950px;background: #7cae15;color:#eee;text-shadow: 1px 1px 1px #495505;display:inline-block;-moz-box-shadow: 3px 3px 4px #007308;
-webkit-box-shadow: 3px 3px 4px #007308;box-shadow: 3px 3px 4px #007308;-moz-border-radius-topleft: 8px;-moz-border-radius-topright:8px;-moz-border-radius-bottomleft:8px;-moz-border-radius-bottomright:8px;-webkit-border-top-left-radius:8px;-webkit-border-top-right-radius:8px;-webkit-border-bottom-left-radius:8px;-webkit-border-bottom-right-radius:8px;border-top-left-radius:8px;border-top-right-radius:8px;border-bottom-left-radius:8px;border-bottom-right-radius:8px;}
.btrix-greenymenu ul{width:950px;padding:0;margin:0 auto}
.btrix-greenymenu li:first-child a{padding:7px 10px 3px}
.btrix-greenymenu li{list-style:none;display:inline-block;float:left}
.btrix-greenymenu li a{background:url(http://1.bp.blogspot.com/-4OIAjD0uSN0/UR1FWgJm2YI/AAAAAAAAAJk/H-ajqHe53Ic/s1600/sprite.png) right no-repeat;color:#fff;display:block;font:16px Oswald;position:relative;text-decoration:none;padding: 8px 15px;-moz-border-radius-topleft: 8px;-moz-border-radius-topright:8px;-moz-border-radius-bottomleft:8px;-moz-border-radius-bottomright:8px;-webkit-border-top-left-radius:8px;-webkit-border-top-right-radius:8px;-webkit-border-bottom-left-radius:8px;-webkit-border-bottom-right-radius:8px;
border-top-left-radius:8px;border-top-right-radius:8px;border-bottom-left-radius:8px;border-bottom-right-radius:8px;}
.btrix-greenymenu li a:hover{background:#333;color:#fff;text-shadow: 1px 1px 1px #000;-moz-border-radius-topleft: 8px;-moz-border-radius-topright:8px;-moz-border-radius-bottomleft:8px;-moz-border-radius-bottomright:8px;-webkit-border-top-left-radius:8px;-webkit-border-top-right-radius:8px;-webkit-border-bottom-left-radius:8px;-webkit-border-bottom-right-radius:8px;
border-top-left-radius:8px;
border-top-right-radius:8px;
border-bottom-left-radius:8px;
border-bottom-right-radius:8px;}
.btrix-greenymenu li a .sf-sub-indicator{overflow:hidden;position:absolute;text-indent:-9999px}
.btrix-greenymenu li li a,.btrix-greenymenu li li a:link,.btrix-greenymenu li li a:visited{background:#439700;border-bottom:1px solid #000;border-right:none;color:#fff;font:12px Arial;position:relative;text-transform:none;width:138px;padding:10px 10px;text-shadow: none;opacity:0.8}
.btrix-greenymenu li li a:hover,.btrix-greenymenu li li a:active{background:#444}
.btrix-greenymenu li ul{height:auto;left:-9999px;position:absolute;width:160px;z-index:9999;margin:0}
.btrix-greenymenu li ul a{width:140px}
.btrix-greenymenu li ul ul{margin:-33px 0 0 157px}
.btrix-greenymenu li:hover>ul,.btrix-greenymenu li.sfHover ul{left:auto}
.menusearch{width:200px;float:right;margin:0 auto;padding:5px 10px 0}
.searchform {margin-top:0px;display: inline-block;*display: inline;padding:0;background:#fff;width:200px;height:23px; overflow:hidden;-webkit-border-radius:3px;-moz-border-radius:3px;border-radius:3px;border:1px solid #5c820d;}
.searchform input {font:italic 12px Arial;color:#222;line-height:23px;height:23px;padding:0;margin:0;}
.searchform .searchfield {background:transparent;padding:0 0 0 6px;margin:0;width: 160px;height:23px;border:0px;outline: none;line-height:23px;}
.searchform .searchbutton{border:none;font-size:12px;height:23px;width:23px;margin:0;padding:0}
6. Go to blogger and click Layout
7. Click Add Gadget and select 'HTML/Javascript
8. Paste below code.
<div class="btrix-greenymenu">
<ul class="sf-menu">
<li><a href="http://www.blogger.com/"><img alt="home" src="https://blogger.googleusercontent.com/img/b/R29vZ2xl/AVvXsEgL-61lq6WhXsjlZsUQE3nAuvmeZ1iIk9NhIz3QVzhDl5yfdt54arT6tBJOzVTb_bjEbFNsTTSvFuR3uqRnIyH2tdIistB0uq-Ml7OfSz5vL55CZc9z6uMBOkD_0JXcWw4_4IbO_2ywZNg/s1600/home.gif" style="padding: 0px;" /></a></li>
<li><a href="#">Menu 1</a></li>
<li><a href="#">Drop Menu 1</a>
<ul>
<li><a href="#">Sub Menu 1</a></li>
<li><a href="#">Sub Menu 2</a></li>
<li><a href="#">Sub Drop Menu 3</a>
<ul>
<li><a href="#">Sub Drop Menu 3.1</a></li>
<li><a href="#">Sub Drop Menu 3.2</a></li>
</ul>
</li>
</ul>
</li>
<li><a href="#">Drop Menu 2</a>
<ul>
<li><a href="#">Sub Menu 1</a></li>
<li><a href="#">Sub Menu 2</a></li>
<li><a href="#">Sub Menu 3</a></li>
</ul>
</li>
<li><a href="#">Menu 2</a></li>
<li><a href="#">Menu 3</a></li>
</ul>
<div class="menusearch">
<form action="/search" class="searchform" method="get">
<input class="searchfield" id="q" name="q" onblur="if(this.value=='')this.value=this.defaultValue;" onfocus="if(this.value==this.defaultValue)this.value=''" type="text" value="Search here...." />
    <input class="searchbutton" src="https://blogger.googleusercontent.com/img/b/R29vZ2xl/AVvXsEh4FkkBduJQOks7E7iEKsG13wGJvw2psVTiD1ZgxHnkUu2XeLHyeN7w6eHkLwaTmaT1LG4wKRlb2j3UbpDeWJFBIohCUX6lKjgHRqDVPBj0bgksgcszJMbZ5j57ijqSLYKAdtDn6nVjCMA/s1600/tombolcari.gif" style="cursor: pointer; vertical-align: top;" type="image" value="Go" />
</form>
</div>
</div>
Replace # with your links.9. Now save your HTML/Javascript'. You are done.
If you have any problem regarding this Greeny Css3 Navigation Bar. Leave a comment.


Marvelous dear it is such a brilliant widget. Thanks for sharing. Sir I am going to write article on one of the best helper to blogger beginners. I selected your name in the list of them. Sir I request you to be a part of my struggle and do simple work for me if you can.
ReplyDeleteYou just write a short story up to 100 words or more on your blog. Story is about Blog beginning with respect to traffic point of view. How many visitors were in first days, after a month that’s it. Sir please kindly do this with in 2 or three days after that send it to
admin@bloggerbasic.com
Regards
www.bloggerbasic.com
Hi Solangi,
DeleteThanks for your comment.
I will contact you.
Nice Widget brother thanks for sharing
ReplyDeletelook's pretty well
Hi Rizwan,
DeleteThis is a unique style Css3 Navigation bar.
Thanks for comment.
Nice to see that widget. brother if we want to create blue navigation bar then can we change color of it. if it posible then please confirm me. thanks
ReplyDeletehttp://w3mix.com/
You can change color by changing background color codes.
DeleteUse hex color code to get color codes.
This comment has been removed by the author.
ReplyDeleteIf you need a help.Can you comment in English.
DeleteNiceMenu bar buddy, but the green color luks little dull.
ReplyDeleteRegard's
http://www.skillblogger.com/
Thanks you deep.
Deletethanks for menu bar. ur blog is special for me.
ReplyDelete